Steps for creating Data pool:
Literature
Master Server/ Master: MySQL database running on production servers.
Slave Server/ Slave: MySQL database running in the Datapool.
Docker image: Image pulled from Docker Hub, that is used to spin up docker containers.
Docker container: Instance of a docker image.
Data pool: Slaves(mysql instances) are running here.
Implementation Stack
MySQL Master Slave Replication
Docker
Docker image: mysql/mysql-server:5.7
Systemd Service
Systemd Timer
Perform the following steps on Master Server that is to be replicated on the Data pool:
Change to root user.
sudo su
Change directory to /etc/mysql/mysql.conf.d
cd /etc/mysql/conf.d
Edit mysqld.cnf
mysqld.cnf
press i
comment the following line
bind-address = 127.0.0.1
uncomment the following line
server-id = 1
add the following lines
log_bin = /var/log/mysql/mysql-bin.log
binlog_format = row
binlog_do_db = openmrs
press esc
press :
enter wq and enter
4. Restart mysql service
systemctl restart mysql
5. Login to mysql using root
mysql -u root -p
6. Create a new user
create user ‘<username>’@’<ip_address_of_datapool>’ identified by ‘<password>’;
7. Grant replication slave rights to this user.
grant replication slave on *.* to ‘<username>’@’<ip_address_of_datapool>’;
8. Flush privileges
flush privileges;
9. Flush tables with read lock
flush tables with read lock;
10. Note down the master details - file name and log position(log pos)
show master status;
11. Open a duplicate session and in this new session run the following command
mysqldump -u root -p openmrs > 1openmrs.sql
12. Switch back to the mysql session and run the following commands
unlock tables;
quit;
13. Transfer the file 1openmrs.sql file to the datapool server
Installing Docker Community Edition on the Datapool Server
Add the GPG key for the official Docker Repository system
curl -fsSL https://download.docker.com/linux/ubuntu/gpg | sudo apt-key add -
2. Add the docker repository to the apt sources
sudo add-apt-repository "deb [arch=amd64] \ https://download.docker.com/linux/ubuntu $(lsb_release -cs) stable"
3. Update the package database with Docker packages
sudo apt-get update
4. Install Docker
sudo apt-get install -y docker-ce
5. Check whether Docker is running
systemctl status docker
6. Add user to the docker user group to avoid typing sudo
sudo usermod -aG docker ubuntu
7. Check if user is added to the group
id -nG
Install MySQL image using Docker
Download MySQL Server Docker image
docker pull mysql/mysql-server:5.7
2. Check whether the image has been added
docker images
Create MySQL Slave servers on Datapool to replicate the Master servers
Create the following directories
datadir (should be empty)
etc
init
mkdir datadir
mkdir etc
mkdir init
2. Change directory to etc
cd etc
3. Create the file my.cnf
touch my.cnf
4. Edit the my.cnf file
vi my.cnf
press i
Add the following lines in the file
[mysqld]
user=mysql
server-id=2
log-bin=mysql-bin
binlog-format=row
relay-log=mysql-relay
replicate-rewrite-db=openmrs-><name_of_the_database_in_the_slave_mysql>
replicate-do-db=<name_of_the_database_in_the_slave_mysql>
binlog-do-db=<name_of_the_database_in_the_slave_mysql>
press esc, enter :wq, enter
5. Change directory to init
cd ../init
6. Copy the 1openmrs.sql file
7. Edit the 1openmrs.sql file as follows
Add the following line as the first line in the file
USE <name_of_the_database_in_the_slave_mysql>;
Save the file
8. Create 2setup_slave.sql file
touch 2setup_slave.sql
Add the following line
CHANGE MASTER TO MASTER_HOST='<master_ip_address>', MASTER_USER='<slave_user_created_on_the_master_mysql_server>', MASTER_PASSWORD='<slave_user_password>', MASTER_LOG_FILE='<master_log_file_name>', MASTER_LOG_POS=<master_log_pos>;
press esc, enter :wq, enter
9. Use docker to create the mysql server container that will have the above configurations with the following command
docker run --name <container_name> \
-e MSQL_ROOT_PASSWORD=<root_password> \
-e MYSQL_USER=<slave_user> \
-e MYSQL_PASSWORD=<slave_user_password> \
-e MYSQL_DATABASE=<database_name_that_will_be_populated_with_master_data> \
--mount type=bind,source=<location_to_datadir>,target=/var/lib/mysql \
--mount type=bind,source=<location_to_my.cnf>,target=/etc/my.cnf \
--mount type=bind,source=<location_to_init>,target=/docker-entrypoint-initdb.d \
-p <host_port_to_be_mapped>:3306 \
-d mysql/mysql-server:5.7
10. Check with the following command whether the container has been successfully created
docker logs <container_name>
Create Systemd Service and Timer to sync the slave server with the master server at a particular time
Create the following files /lib/systemd/system
<service_name>.service
<service_name>.timer
2. Add the following lines to .service file
[Unit]
Description=Service started for syncing with Master afi
[Service]
ExecStart=<location of the script which will be run to sync slave with master>
[Install]
WantedBy=multi-user.target
3. Add the following lines to .timer file
[Unit]
Description=Timer started for syncing with Master afi
[Timer]
OnCalendar=*-*-* <HH:MM:SS>
[Install]
WantedBy=multi-user.target
Create the Script which will sync the slave with the master, and be run by the service.
#!/bin/bash
docker exec <container_name> mysql --user=root --password=<root_password> -e "
STOP SLAVE IO_THREAD;
START SLAVE SQL_THREAD;"
sleep 1m
docker exec <container_name> mysql --user=root --password=<root_password> -e "
STOP SLAVE SQL_THREAD;
START SLAVE IO_THREAD;"
References
https://dev.mysql.com/doc/mysql-installation-excerpt/5.7/en/docker-mysql-getting-started.html
https://www.certdepot.net/rhel7-use-systemd-timers/
https://linuxconfig.org/how-to-create-systemd-service-unit-in-linux
https://severalnines.com/database-blog/multiple-delayed-replication-slaves-disaster-recovery-low-rto
Current Datapool Status

demo is not functioning (disabled)
afi and vso slave databases are accessible via 3307 and 3308 ports
refer the demo file structure and scripts for creating further containers for slaves, debugging and logging
Credentials
AFI
User: root
Password: i10hi1c_afi
User: dbslave
Password: dbslave_afi
Database: OpenMRS_AFI
Port: 3307
SQL URI: mysql://dbslave:dbslave_afi@13.229.131.242:3307/OpenMRS_AFI
2. VSO
User:root
Password:i10hi1c_vso
User:dbslave
Password: dbslave_vso
Database: OpenMRS_VSO
Port:3308
SQL URI: mysql://dbslave:dbslave_vso@13.229.131.242:3308/OpenMRS_VSO
3. Replication Users on AFI and VSO production servers:
AFI
User: dbslave
Password: dbslave_afi
2. VSO
User:dbslave
Password: dbslave_vso
Encountered Issues:
To re-start Docker
To check if the docker container is running, run the following command:
docker ps
<if no row returns → docker is down>
Path: /home/ubuntu/datalake/afi/scripts
Names of the container - afi, vso
Command to start docker:
docker restart <container name>
Once the docker is restarted, it is necessary to restart the sync service & enable the same (else the replication timer will not be scheduled).
The server location of service & timer is: /lib/systemd/system
sync_master_afi.service
sync_master_afi.timer
sync_master_vso.service
sync_master_vso.timer
Command to list the scheduled timers:
system$ sudo systemctl list-timers sync_master*
Command to check the status of the service & timer
systemctl status sync_master_afi.service
systemctl status sync_master_vso.service
systemctl status sync_master_afi.timer
systemctl status sync_master_vso.timer
To enable the service run following commands:
systemctl enable sync_master_afi.service
systemctl enable sync_master_vso.service
To enable the timer run the following commands:
systemctl enable sync_master_afi.timer
systemctl enable sync_master_vso.timer
2. If the datapool is out of sync with production:
Perform the following steps on Master Server that is to be replicated on the Datapool
1.Using Putty, connect to prod server. Change to root user.
sudo su
2. Restart mysql service
systemctl restart mysql
3. Login to mysql using root
mysql -u root -p
4. Run following commands:
RESET MASTER;
FLUSH TABLES WITH READ LOCK;
SHOW MASTER STATUS;
5. The status appears as below: Note that position number varies!
+------------------+----------+--------------+------------------+
| File | Position | Binlog_Do_DB | Binlog_Ignore_DB |
+------------------+----------+--------------+------------------+
| mysql-bin.000001 | 98 | your_DB | |
+------------------+----------+--------------+------------------+
6. Note down the master details - file name and log position(log pos)
7. Open a duplicate session and in this new session run the following command
mysqldump -u root -p openmrs > 1openmrs.sql
8. Switch back to the mysql session and run the following commands
unlock tables;
quit;
9. Transfer the file 1openmrs.sql file to the datapool server
Perform the following steps on Master Server that is to be replicated on the Datapool (In all the steps mentioned below, it is assumed that we are replicating the AFI docker container. For VSO or any other container make the necessary changes)
Stop the docker that is out of sync
docker stop afi
Remove the docker container
docker rm afi
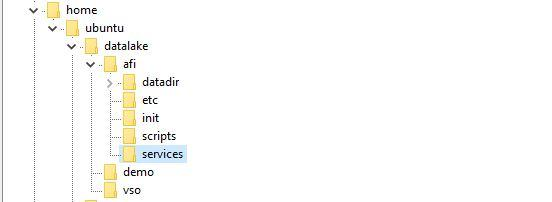
The file structure maintained at datapool is:
Go to path - /home/ubuntu/datalake
Take the backup of the container folder that you want to replace on your local machine
delete the container folder from datalake folder
Now create a new directory for the conatainer
mkdir afi
Under this new folder create following 5 sub folders
mkdir datadir (it should be empty)
mkdir init
mkdir etc
mkdir scripts
mkdir services
Change directory to etc
cd etc
Create the file my.cnf
touch my.cnf
Edit the my.cnf file
vi my.cnf
To insert text press i
Add the following lines in the file:
[mysqld]
user=mysql
server-id=2
log-bin=mysql-bin
binlog-format=row
relay-log=mysql-relay
replicate-rewrite-db=openmrs->OpenMRS_AFI
replicate-do-db=OpenMRS_AFI
binlog-do-db=OpenMRS_AFI
Press esc, enter :wq, enter to save the file
Change directory to init
cd ../init
Copy the 1openmrs.sql file
Edit the 1openmrs.sql file as follows:
Add the following line as the first line in the file
USE <name_of_the_database_in_the_slave_mysql>;
i.e. USE OpenMRS_AFI;
Press esc, enter :wq, enter to save the file
Create 2setup_slave.sql file
touch 2setup_slave.sql
Add following lines to the sql file:
CHANGE MASTER TO MASTER_HOST='<master_ip_address>', MASTER_USER='<slave_user_created_on_the_master_mysql_server>', MASTER_PASSWORD='<slave_user_password>', MASTER_LOG_FILE='<master_log_file_name>', MASTER_LOG_POS=<master_log_pos>;
in case of afi the the above lines will be
CHANGE MASTER TO MASTER_HOST='13.127.240.201', MASTER_USER='dbslave', MASTER_PASSWORD='dbslave_afi', MASTER_LOG_FILE='mysql-bin.000001', MASTER_LOG_POS=<as noted in step#5>;
Press esc, enter :wq, enter to save the file
Under subfolder “Scripts”, copy the files from backup taken on local machine (under same subfolder) i.e. files viz. create_container.sh, mysql.sh & dbash.sh. Provide the necessary execution rights to the files.
Under subfolder “Services”, create 2 files viz. service.log & debug.txt using command:
touch service.log
touch debug.txt
Use docker to create the mysql server container that will have the above configurations with the following command:
docker run --name <container_name>
-e MYSQL_ROOT_PASSWORD=<root_password>
-e MYSQL_USER=<slave_user>
-e MYSQL_PASSWORD=<slave_user_password>
-e MYSQL_DATABASE=<database_name_that_will_be_populated_with_master_data>
--mount type=bind,source=<location_to_datadir>,target=/var/lib/mysql
--mount type=bind,source=<location_to_my.cnf>,target=/etc/my.cnf
--mount type=bind,source=<location_to_init>,target=/docker-entrypoint-initdb.d
-p <host_port_to_be_mapped>:3306
-d mysql/mysql-server:5.7In case of afi, the command will be:
docker run --name afi
-e MYSQL_ROOT_PASSWORD=i10hi1c_afi
-e MYSQL_USER=dbslave
-e MYSQL_PASSWORD=dbslave_afi
-e MYSQL_DATABASE=OpenMRS_AFI
--mount type=bind,source=/home/ubuntu/datalake/afi/datadir,target=/var/lib/mysql
--mount type=bind,source=/home/ubuntu/datalake/afi/etc/my.cnf,target=/etc/my.cnf
--mount type=bind,source=/home/ubuntu/datalake/afi/init,target=/docker-entrypoint-initdb.d
-p 3307:3306
-d mysql/mysql-server:5.7 &>> /home/ubuntu/datalake/afi/services/debug.txt
Check with the following command whether the container has been successfully created
docker logs <container_name> i.e. docker logs afi
Run the scripts in “Scripts” folder viz. dbash.sh & mysql.sh
Enable the sync master service & timer as described in Issue#1
Copy the shell scripts from backup (local machine) “Services” folder to “Services” folder in docker container folder i.e /home/ubuntu/datalake/afi
Provide necessary read/write/execute rights to the shell scripts
Login to Superset with admin login
Go to Sources → Databases.
Select the container newly created. Click on Edit record button.
Hit the “Test Connection” button to ensure that the DB connection is re-established.
Check if dashboard displays correct data